Google is wondrous thing! Recently, several online friends have joined the Blogger family - one of whom also selected this layout. As we both enjoy digital scrapping, I decided to look for a way to personalize my header, as my blog is a combination of my gypsy-lifestyle and digital crafts (which are better suited to living in confined quarters with weight and storage limitations).
Finding a link to premade blog header art, I opted to find what was necessary to create my own - prior links state the obvious . . . I'm a camera-addict and rather hooked on digital scrapbooking!
Two links gave me most of the information I was seeking - template size and how to upload my designs.
The first-
http://freetemplates.blogspot.com/
clued me into template sizes. It's a great site, but there was ONE omission - the pixel size for this header is actually 1140 X 180 (I can extend it to 1320 x 180 to fill the box).
I spent a delightful evening creating my first heading. Knowing I wanted to include the title as part of my artwork I logged onto www.1001freefonts.com and found a round font that I could fill with my own art. Because it was an outline font I first set it to my header template (saved as png), then saved a jpeg copy to give me a solid background fill. Closing the saved type and reopening it, I inserted it on the top of the paper I wanted to fill the letters with. Using my magic wand, I first eliminated the white background.
Now I had the font 'Caligraph', with the colors I wanted INSIDE my letters. I used my magic wand, one letter at a time and cut and pasted the background inside my letters. Once that was done, I pulled out the background to be sure the letters were what I envisioned.
Afterwards I added the wondrful plaid background paper from the Digital Scrapbooks Seasons and Holidays collection, and the stitching, created by talented Gunhild Storeid http://www.storeide.se/gunhild/index.htm.
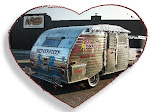
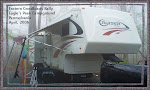
Finally, I outlined the letter edges to give them a bit more definition and added a feint shadow. The image of my 'House on wheels' was trimmed to fit and blend in with the other elements, with a very minor, soft shadow there too.
So, now I had my first blog header - and size - but the uploading instructions were beyond this Granny's brain (seriously!).
Back to Google search under 'creating free blog headers' . . .
and there, deceptively simple, was a great video tutorial that was almost embarrassing in its simplicity. Again, the author failed to give the header sizes- but the directions tell you that if you request, it will resize your art to the appropriate size for your blog (1140 pixels here - 1140 x 180 overall).
The second link:
http://blogger-templates.blogspot.com/
My thanks to both these great wonderful bloggers.
One more item of note - when uploading your image for your header, note that one option is to automatically reduce the image to the suggested width. If you have a set image that you do NOT want rduced, DO NOT CHECK THIS BOX.
I changed my layout since I first wrote this and discovered that the suggested pixel width will not fill the full box, so you may have to experiment - The 180 depth is fine - but the widths change according to your layout choice. I did update the measurements to the size shown, adding more original art that I created - but I can still add another 180 pixels in width - and will most likely do so - eventually!
Showing posts with label Digital Scrapbooks Seasons and Holidays Collection. Show all posts
Showing posts with label Digital Scrapbooks Seasons and Holidays Collection. Show all posts
Sunday, June 1, 2008


Subscribe to:
Posts (Atom)